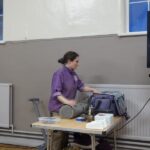
 Colin has been turning in the region of 40 years. For many years he was the AWGB South Eastern Rep and has recently moved “North” nearer his daughter. Moving was a fairly traumatic experience, not because of the house, etc. but many of his tools were disposed of before the move and worst of all, his stock of turning wood had to be disposed of. A small amount of offcuts and exotics were saved and with a new lathe , bandsaw and tools normal activities was resumed.
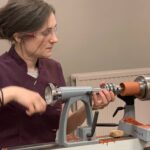
The topic for the evening was off-centre turning. Spindle roughing gouges are not part of Colin’s toolkit. He prefers an Ashley Iles Continental gouge which sits somewhere between the spindle roughing gouge and the traditional spindle gouge.
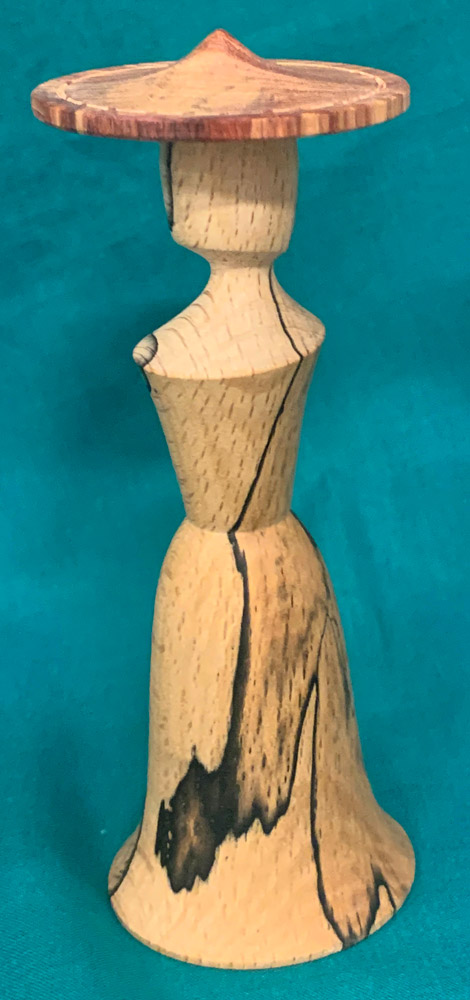
The first turning was of a lady with a wide brimmed hat, drilled around the rim to hold earrings. A piece of 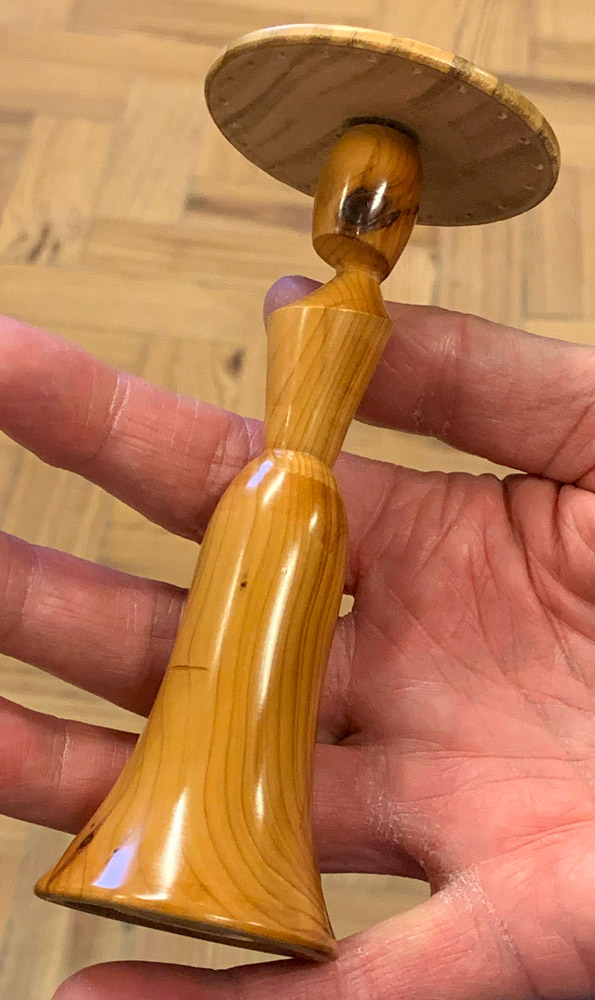 spalted beech around 6 inches long and 2 inches square was mounted between a Cronos drive held in a chuck and a live ring centre. The Cronos drive is similar to the Steb Centre and Axminster Pro Drive but, at around £10, is significantly less expensive. The Tailstock end of the blank was rounded to fit into Colin’s Nova chuck that was fitted with Gripper jaws. The blank was reversed after removing the Cronos drive from the chuck. The indent left by the Cronos drive was used as the centre of the live ring centre. The whole blank was turned to round.
Close to the Chuck, a thin parting tool was used to make a cut around 3/8 inch deep. (you may notice the bilingual nature of length) About 68 to 70 mm from the parting tool cut was marked to divide the blank near the bodice, separating the head and neck from the rest of the body.
The next job was to shape the skirt and waist and that section was then sanded quickly – sanding was kept 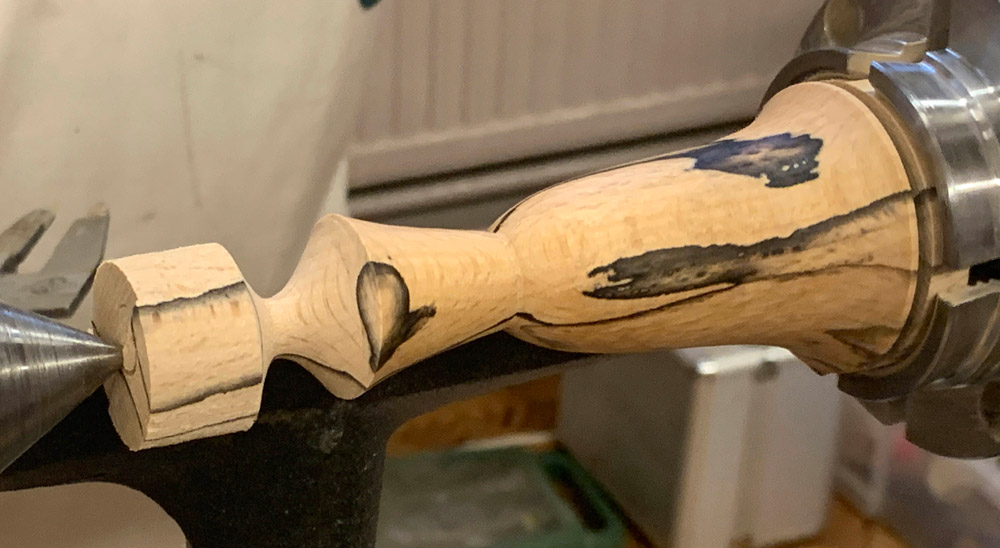 to a minimum to avoid large clouds of dust in the hall. Using the parting tool at around 20 degrees around 1 inch up from the waist marked the top of the bodice. Using a spindle gouge, cut a curve towards the waste end of the blank – blend into the waste. Sand and apply a 3 to 1 mix of sanding sealer and cellulose thinners. When dry, cut back and apply thin coats of melamine to finish.
Taking care to choose the best side of the blank as the front of the piece, slacken the chuck and move the 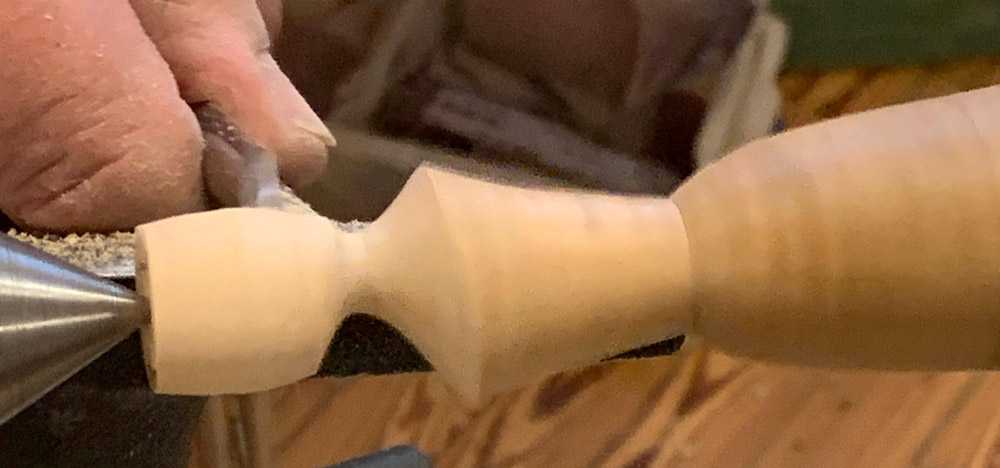 ring centre to the line formed by the ring (about 5mm). Tighten the chuck and check that the piece clears the tool rest. With the lathe speed low, turn on the lathe and gradually bring up the speed and then the top of the piece from the top of the bodice to the top of the blank. Using a continental gouge, turn from the top of the bodice to the top of the blank. Next form the neck approximately 7mm in diameter using a spindle gouge. When down to round, speed up the lathe and use the upper wing of the gouge to sheer cut the underside of the chin. Sand up to 600 grit and apply sanding sealer and finish.
 Move the live centre about half the original offset in the opposite direction – Don’t forget to tighten the chuck. Take care not to make the head too small since a 6 mm hole is required to attach the hat. Fit Jacobs chuck with a 6mm drill bit and drill a hole about 5 or 6 mm deep to fit the hat – take care not to go too deep or the head will fall off. Sanding sealer followed by a beeswax / carnauba wax mix is used for the finish. Colin prefers to make his own mixture of waxes and usually sets it in cake cases producing usable sized pieces. The location of this activity needs careful planning to avoid any domestic friction.
Clean up the top and then go back to the original hold in the chuck before parting off at the base. Parting off leaves the base a little rough and it is advisable to cover the base with a piece of baize to avoid any damage to the surface the figure is stood on.
An offcut of Brazilian Tulip wood was placed in the chuck – only a small amount is needed so the length isn’t important but it needs to be around 2 inches square.
Using a spindle gouge, cut a cove in the end grain, rising to a near point at the centre after truing up the outer edge.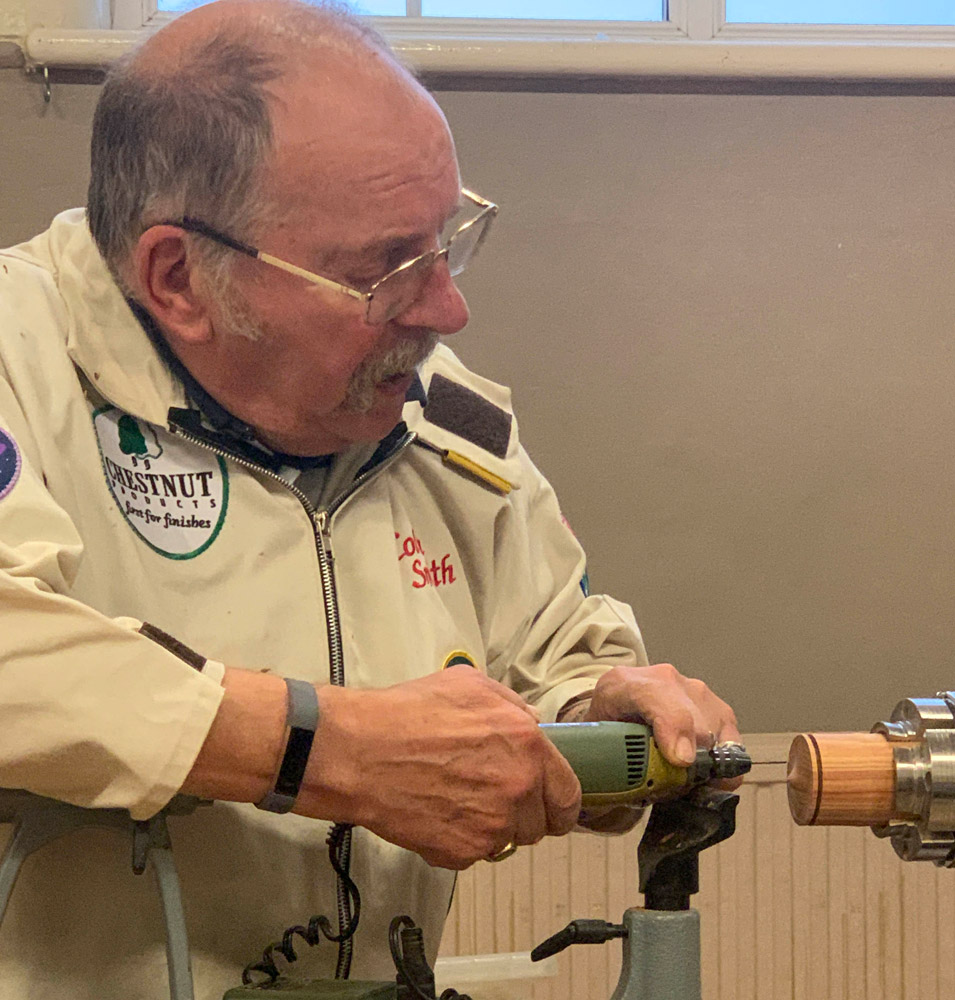 The hat should be just over ¼ inch thick. Using a parting tool, make a cut to form a hat brim about 3mm thick. Cut a small grove on the top surface of the hat brim then with a 2mm drill make a series of holes around the brim, using the groove just cut to locate the drill tip. Colin used a 12v Proxxon drill. Formerly, he used a mains drill and cut through the cable and didn’t recommend having a live lathe bed. An even number of holes is required to hang pairs of ear rings
– Colin undertakes this free hand since using indexing on the lathe takes a long time, particularly if you make a batch of the item. The underside of the hat was then turned down to a 6MM spigot to fit the hole previously drilled in the top of the head.
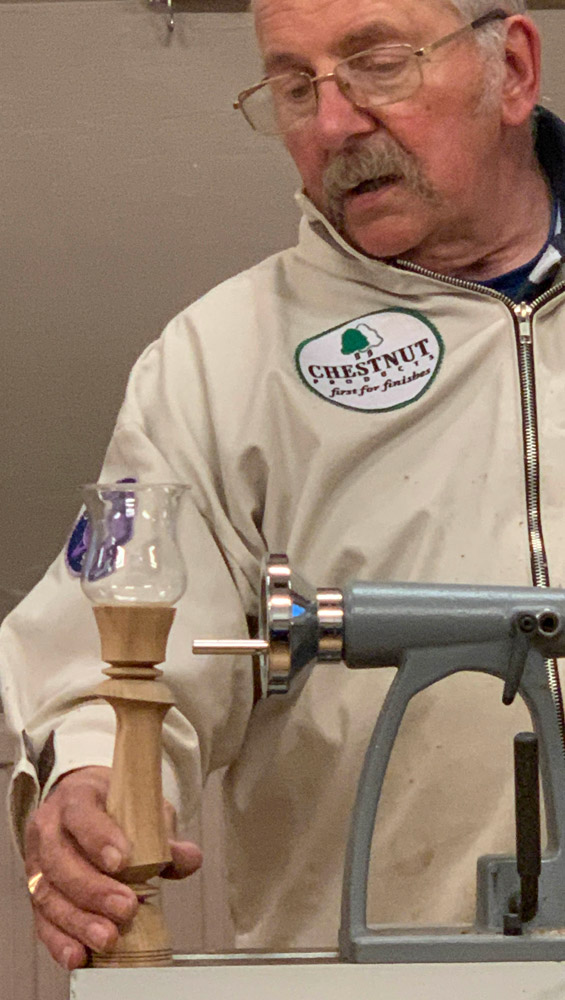
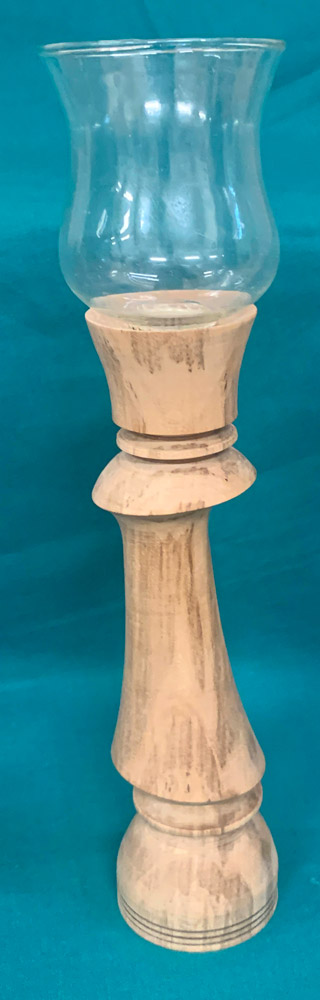
After the break an off-centre candlestick was created. Colin started with a short length of timber with a 25mm hole drilled in one end to accept a tulip shaped glass candle holder with a spigot shaped end that was inserted into the wooden candle stick. The base of the candle stick was held in the chuck and the tailstock end had a plug inserted into the drill hold. The insert was marked with a centre point and two others about 10mm from the centre in a straight line. The plug should be tapered for a snug fit since it is important that it doesn’t move during the turning process. A live point centre was placed in the centre hole and the chuck tightened on the other end. Alignment checked and rounded off. Cut a cove below the candle cup with a spindle gouge, taking care not to cut into the predrilled hole. Clean up with a skew.
Slacken the chuck and move the live centre to one of the offset positions. After tightening the chuck, shape 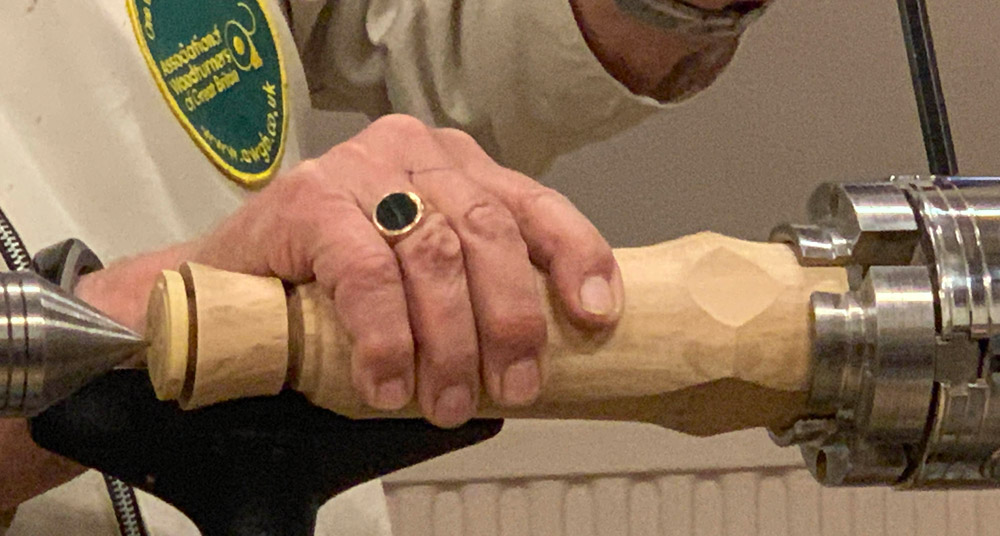 the middle part of the candle stick. It is important to sand and finish as the project develops – it would be difficult to complete when all the turning has been completed. Put the revolving centre back to the central position and refine the curve under the cup.
Move the live centre to the opposite side to that previously used and check the tool rest and chuck. A parting tool cut was made near the base until it was visible all around the candlestick. Use a parting tool to set the diameter at the bottom of the candle stick and use the skew to clean up.
 Move back to the centre position, cut a cove near the bottom and a radius on the edge of the base. Colin produced a Gary Rance round skew and admitted he had never found a specific use for it. After putting a couple of V cuts around the base, a tinned copper wire was used to burn marks around the base. The wire bobbin was held in one hand whilst the other end was placed over the tool rest to help dissipate the heat generated in the wire. After parting off, the base was cleaned up with a carving tool.
The competition item for the month was a Bud Vase and Colin made a two piece version of such a vessel. An off cut of burr elm was used to shape the base and a hole drilled to accommodate the upright part of the vase. The upright had been pre drilled. It was turned down to round and a spigot made at the lower end to fit the hole in the base. A smaller chuck to hold the spigot was put on the lathe and the stem of the vase was tapered from top to bottom. After making two V cuts, black lines were burned near the top of the vessel.

At the end of the demonstration, members joined together in a round of applause to thank Colin for an entertaining evening.


Another relatively local demonstrator definitely worth a future invitation.
Good to see Colin focussing on spindle turning with the added challenge (risk) of off centre twist.
Perhaps an off centre bowl next time .