The second meeting of 2021 was slightly better attended than the first one with more familiar faces and a couple of new ones. We have a new member, Aubery Lawson, so welcome Aubery and look forward to seeing you at future meetings

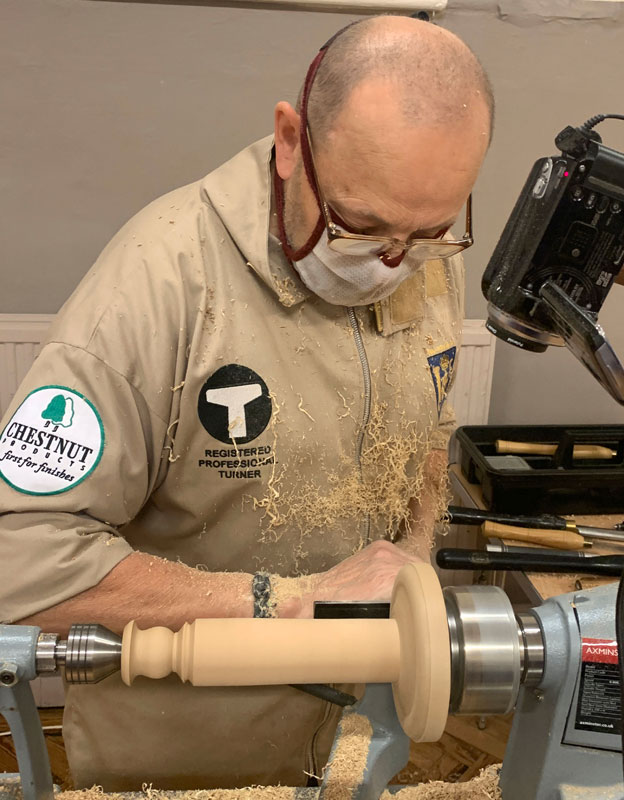
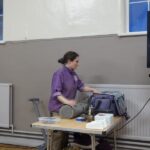
Steve began by saying he has been battling cancer for the last three years and hadn’t been up to designing new demonstrations recently however his wife had consulted the archives and the four piece candle stick had not been previously seen at our club.
The first part of the project was the base, produced from a disc of oak about 5 inches in diameter and 1.5 inches thick. A hole was predrilled in one side to act as the mortice for the stem if the candle stick. The piece was held between centres with the drive centre in the centre if the predrilled hole. After round the outer edge of the blank with a long grind bowl gouge, a chucking recess was formed in what would become the base of the candlestick. Instead of a plain recess, a button was turned in the centre of the chucking point. After truing the base of the candle stick, it was put aside while the stem of the candle stick was turned.
The stem was made from a 2 inch square piece of oak about 11 inches long. Before turning on the lathe, Steve undertook the 5 point check to ensure a good hold on the blank. First check that the tailstock end is locked in position and the rotating centre is tight against the work piece with the locating bolt tightened to avoid any movement in the quill. Then lock down the banjo ensuring a gap of 3/8 inches between the work piece and the tool rest. Finally tighten the bolt to secure the tool rest in place.
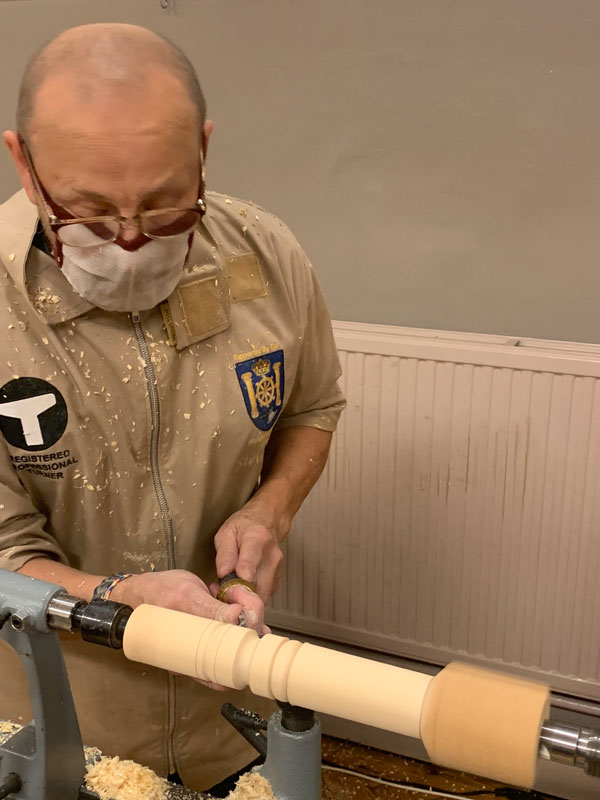
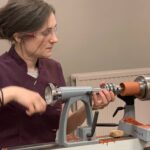
 After turning the blank to round with a spindle roughing gouge, a tenon was formed on one end to fit the mortice drilled in the base. With a little adjustment, a snug fit was achieved. The base with the attached stem were then mounted in a chuck and a holel drilled in the top of the column to receive the candle. With a live centre in place the shape of the base and the stem were then developed.
 The base was shaped with a cove on top instead of the more usual ogee shape. Probably better to look at the photo to see the shape rather than me attempt to describe the various bead and coves that completed the shape. One feature that was discussed was the flat are below the thistle shaped
candle holder. Steve said that we should remember that areas of the turning could be embellished with texturing or flutes or carving to add something more unique to the object. However, in this instance, the ring was left plain and complemented the final shape.
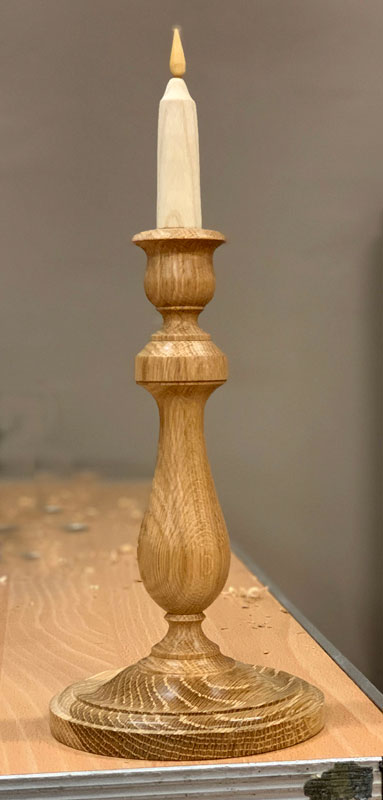
Following the break, a short candle was turned from a piece of white ash with a suitably sized tenon to fit the candle holder. The final touch was to drill a small hole in. the top of the candle and add a flame turned from a small piece of boxwood.
 The demonstration then turned to the newer turners in the audience. Using a piece of joinery grade pine, Steve explained how to mark the centre on either end of the blank, by drawing corner to corner or using lines parallel to the sides to form a small square. He stressed that the drive centre should be knock in with the blank on the floor and not the lathe bed. After mounting between centres and undertaking the 5 point check outlined above, about ¾ of the blank was brought down to round, leaving about 3 inches square at one end. The formation of a pommel, the transition from square to round, was then demonstrated using the long point of the skew, working back to the line in the desired position.
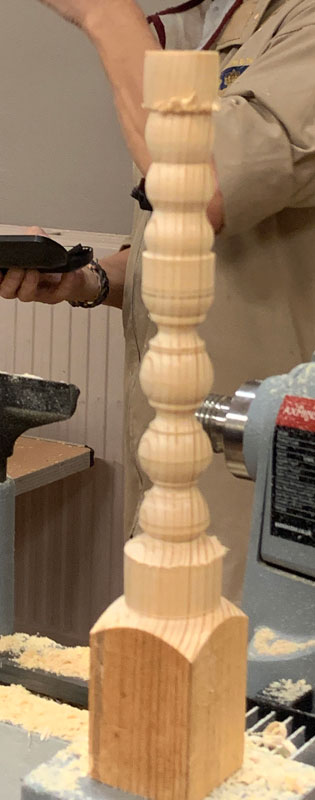 The formation of beads by marking both side with the long point of the skew in a vertical position and then rounding both sides with a spindle gouge after marking the centre with a pencil line. Steve stressed the importance of the grip on the tool to facilitate the necessary twist, swing and lifting of the tool handle. He also emphasised that body movement plays and essential part in achieving good results. Standing still directly in front of the workpiece makes it impossible to get the necessary swing and lift. Bead formation was also demonstrated with the. skew chisel using the short point and remembering that it is important to always complete the cut, ending with the cutting edge of the skew in a vertical position,
The formation of coves was then demonstrated and the need to scoop out the shape from either side with the flute of the spindle gouge ending up open (flat across the top) a the bottom of the cove. The finishing cut starts out with a closed flute (cutting edge vertical) and once the cut has been established, twisting the gouge whilst lowering the handle to the 12 o’clock position at the end of the cut. Where cove ae next to bead, a small flat known as a fillet if formed to mark the transitions from cove to bead. The design of the spindle needs a keen eye and practice, practice, practice to achieve pleasing results.
Hope you enjoyed the evening and look forward to seeing you at the next meeting on 25th November when Chris Fisher, The Blind Woodturner will be demonstrating. Be prepared to be amazed!
Howard Hughes, Secretary CNWWA


Steve’s demonstration was very interesting, and I have to say that your report on it, Howard, is extremely thorough and well written!